

为了获得更高的性能,有时候我们会需要在浏览器运行C/C++程序,这在目前可以使用WebAssembly的技术实现,WebAssembly(通常缩写为 Wasm),它将浏览器语言的支持范围扩展到了 JavaScript 之外。Wasm 的工作原理大同小异,可在广泛的平台上为定义的运行时提供二进制可执行文件。由于运行时是一种低级虚拟机(类似于 JVM),因此可嵌入到许多主机应用中。
这里我们使用C/C++程序为例来说明WebAssenmbly的使用。
1. 安装
参考官网:https://emscripten.org/docs/getting_started/downloads.html
以Linux为例,先clone emsdk的repo
# Get the emsdk repo
git clone https://github.com/emscripten-core/emsdk.git

# Enter that directory
cd emsdk
然后选择安装稳定版(lts)或者最新版(latest),再设置环境变量:
# Download and install the latest SDK tools.
./emsdk install latest

# Make the "latest" SDK "active" for the current user. (writes .emscripten file)
./emsdk activate latest

# Activate PATH and other environment variables in the current terminal
source ./emsdk_env.sh完成上述步骤之后使用emcc或em++命令,如果没有报找不到命令的错误就是没问题了。
2. 简单编译示例
还是经典hello world
hello.cpp
#include <iostream>

using namespace std;

extern "C"
{
    void sayHello()
    {
        cout << "Hello, World!" << std::endl;
    }
}注意这里如果是C++的话需要将我们要导出的函数写在extern "C"里面,然后用下面的命令编译:
em++ hello.cpp -o hello.js -s EXPORTED_FUNCTIONS='["_sayHello"]' -s EXPORTED_RUNTIME_METHODS='["cwrap"]'将要导出的函数名字前面加上下划线写在-s EXPORTED_FUNCTIONS的列表里面,这之后将生成两个文件hello.js和hello.wasm,hello.js是帮我们调用wasm里面的二进制程序的。我们只需要在其它js代码里面引入hello.js就可以使用_sayHello()函数了。
新建一个hello.html
<!DOCTYPE html>
<html>

<head>
    <title>hello/main.html</title>
</head>

<body>
    <script src="./hello.js"></script>
    <script>
        Module.onRuntimeInitialized = function () {
            Module._sayHello();
        };
    </script>
</body>

</html>这里需要注意的是导出的函数需要在Module.onRuntimeInitialized里面使用。
在浏览器打开然后检查控制台(console),可以看到打印了Hello, World!

再来一个有参数和返回值的函数示例add.cpp
#include <iostream>

using namespace std;

extern "C"
{
    int add(int a, int b)
    {
        return a + b;
    }
}
编译与上面的hello类似:
em++ add.cpp -o add.js -s EXPORTED_FUNCTIONS='["_add"]' -s EXPORTED_RUNTIME_METHODS='["cwrap"]'add.html文件
<!DOCTYPE html>
<html>
    <head>
        <title>add/add.html</title>
    </head>
    <body>
        <div id="output"></div>
        <script src="./add.js"></script>
        <script>
            Module.onRuntimeInitialized = function () {
                var o = Module._add(1, 2);
                document.getElementById("output").innerText = "1 + 2 = " + o;
            };
        </script>
    </body>
</html>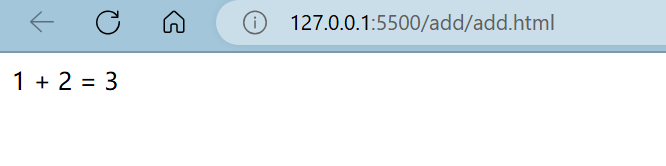
3. 复杂数据结构
上面的示例函数返回的是一个简单的数字没有问题,但是如果需要返回比较复杂的数据结构,比如vector,js就不能直接接收了。一个简单的解决办法是编码成json字符串返回,然后再在js里面解析这个json字符串得到我们返回的复杂数据结构。
使用开源的C++ json库:https://github.com/nlohmann/json
将json.cpp文件下载到当前代码目录即可使用,一下是一个简单的返回vector的函数:
#include <iostream>
#include <vector>
#include "json.hpp"

using namespace std;

extern "C"
{
    string json_example()
    {
        vector<vector<int>> v = {{1, 2, 3}, {4, 5, 6}, {7, 8, 9}};
        nlohmann::json j = v;
        return j.dump();
    }
}
按照上面同样的方式编译出js文件和wasm文件,然后在js里面可以解析这个返回的json字符串从而得到这个二维数组。
var resultJson = _json_example()
console.log("resultJson:", resultJson);
result = JSON.parse(resultJson);
4. 文件系统
WebAssembly里面不能直接读取本地文件,需要将文件打包到js的虚拟文件系统,在文件比较大比较多的情况下就不能这样做了不然在浏览器会非常卡。
打包方式就是在编译的时候加上参数--preload-file xxx,xxx就是要打包的文件名或文件夹名,如果是文件夹,之后在js里面的访问路径都是以这个文件夹为根目录。
fileName = "a.txt"
fileContent = FS.readFile(`xxx/${fileName}`, { encoding: 'utf8' });FS的其它具体用法可以根据需要去了解。
以上就是对WebAssembly的简单介绍了,了解这些基本的使用方法足够实现一个复杂的程序运行在浏览器了。如果文章有什么错误或者没讲明白的地方可以在评论区提出来。
评论区